10th of June
2015/06/09 in General News
Find out what everybody is talking about:
by Nicola A&H
by Nicola A&H
2015/05/22 in General News
We have recently completed a series of tests with the Qu USB interface, recording to / playing from iOS devices via the Apple ‘Lightning to USB Camera adapter’, and we are pleased to confirm that the latest generation of iPad Air and iPad Mini can successfully record and stream up to 32 tracks!
You can now use Qu mixers with a number of DAW apps including Auria, Steinberg Cubasis, GarageBand, FL Studio HD and Presonus Capture.
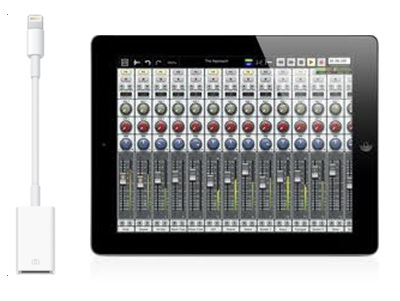
For best performance we recommend using Qu firmware V1.7 or higher and the latest iPad Air hardware with iOS 8 or higher.
by Nicola A&H
2015/04/10 in General News
Come visit us in Frankfurt next week at booth C22, Hall 8.0 to catch up with latest GLD Chrome V1.5 and Qu V1.7 updates.
There might be a treat in store for Qu Android users…
by Nicola A&H
2015/03/26 in General News
The end of the month is coming soon and as promised, here is Qu firmware V1.7 with support of Qu-Pac, channel Ducker, flexible dSNAKE Input patch, and a number of exciting new iOS features including Qu-Pad Scenes, FX, Library and SoftKey control!
Download V1.7 here, have a look at the New Features and Release Notes and enjoy.
by Nicola A&H
2014/11/06 in General News
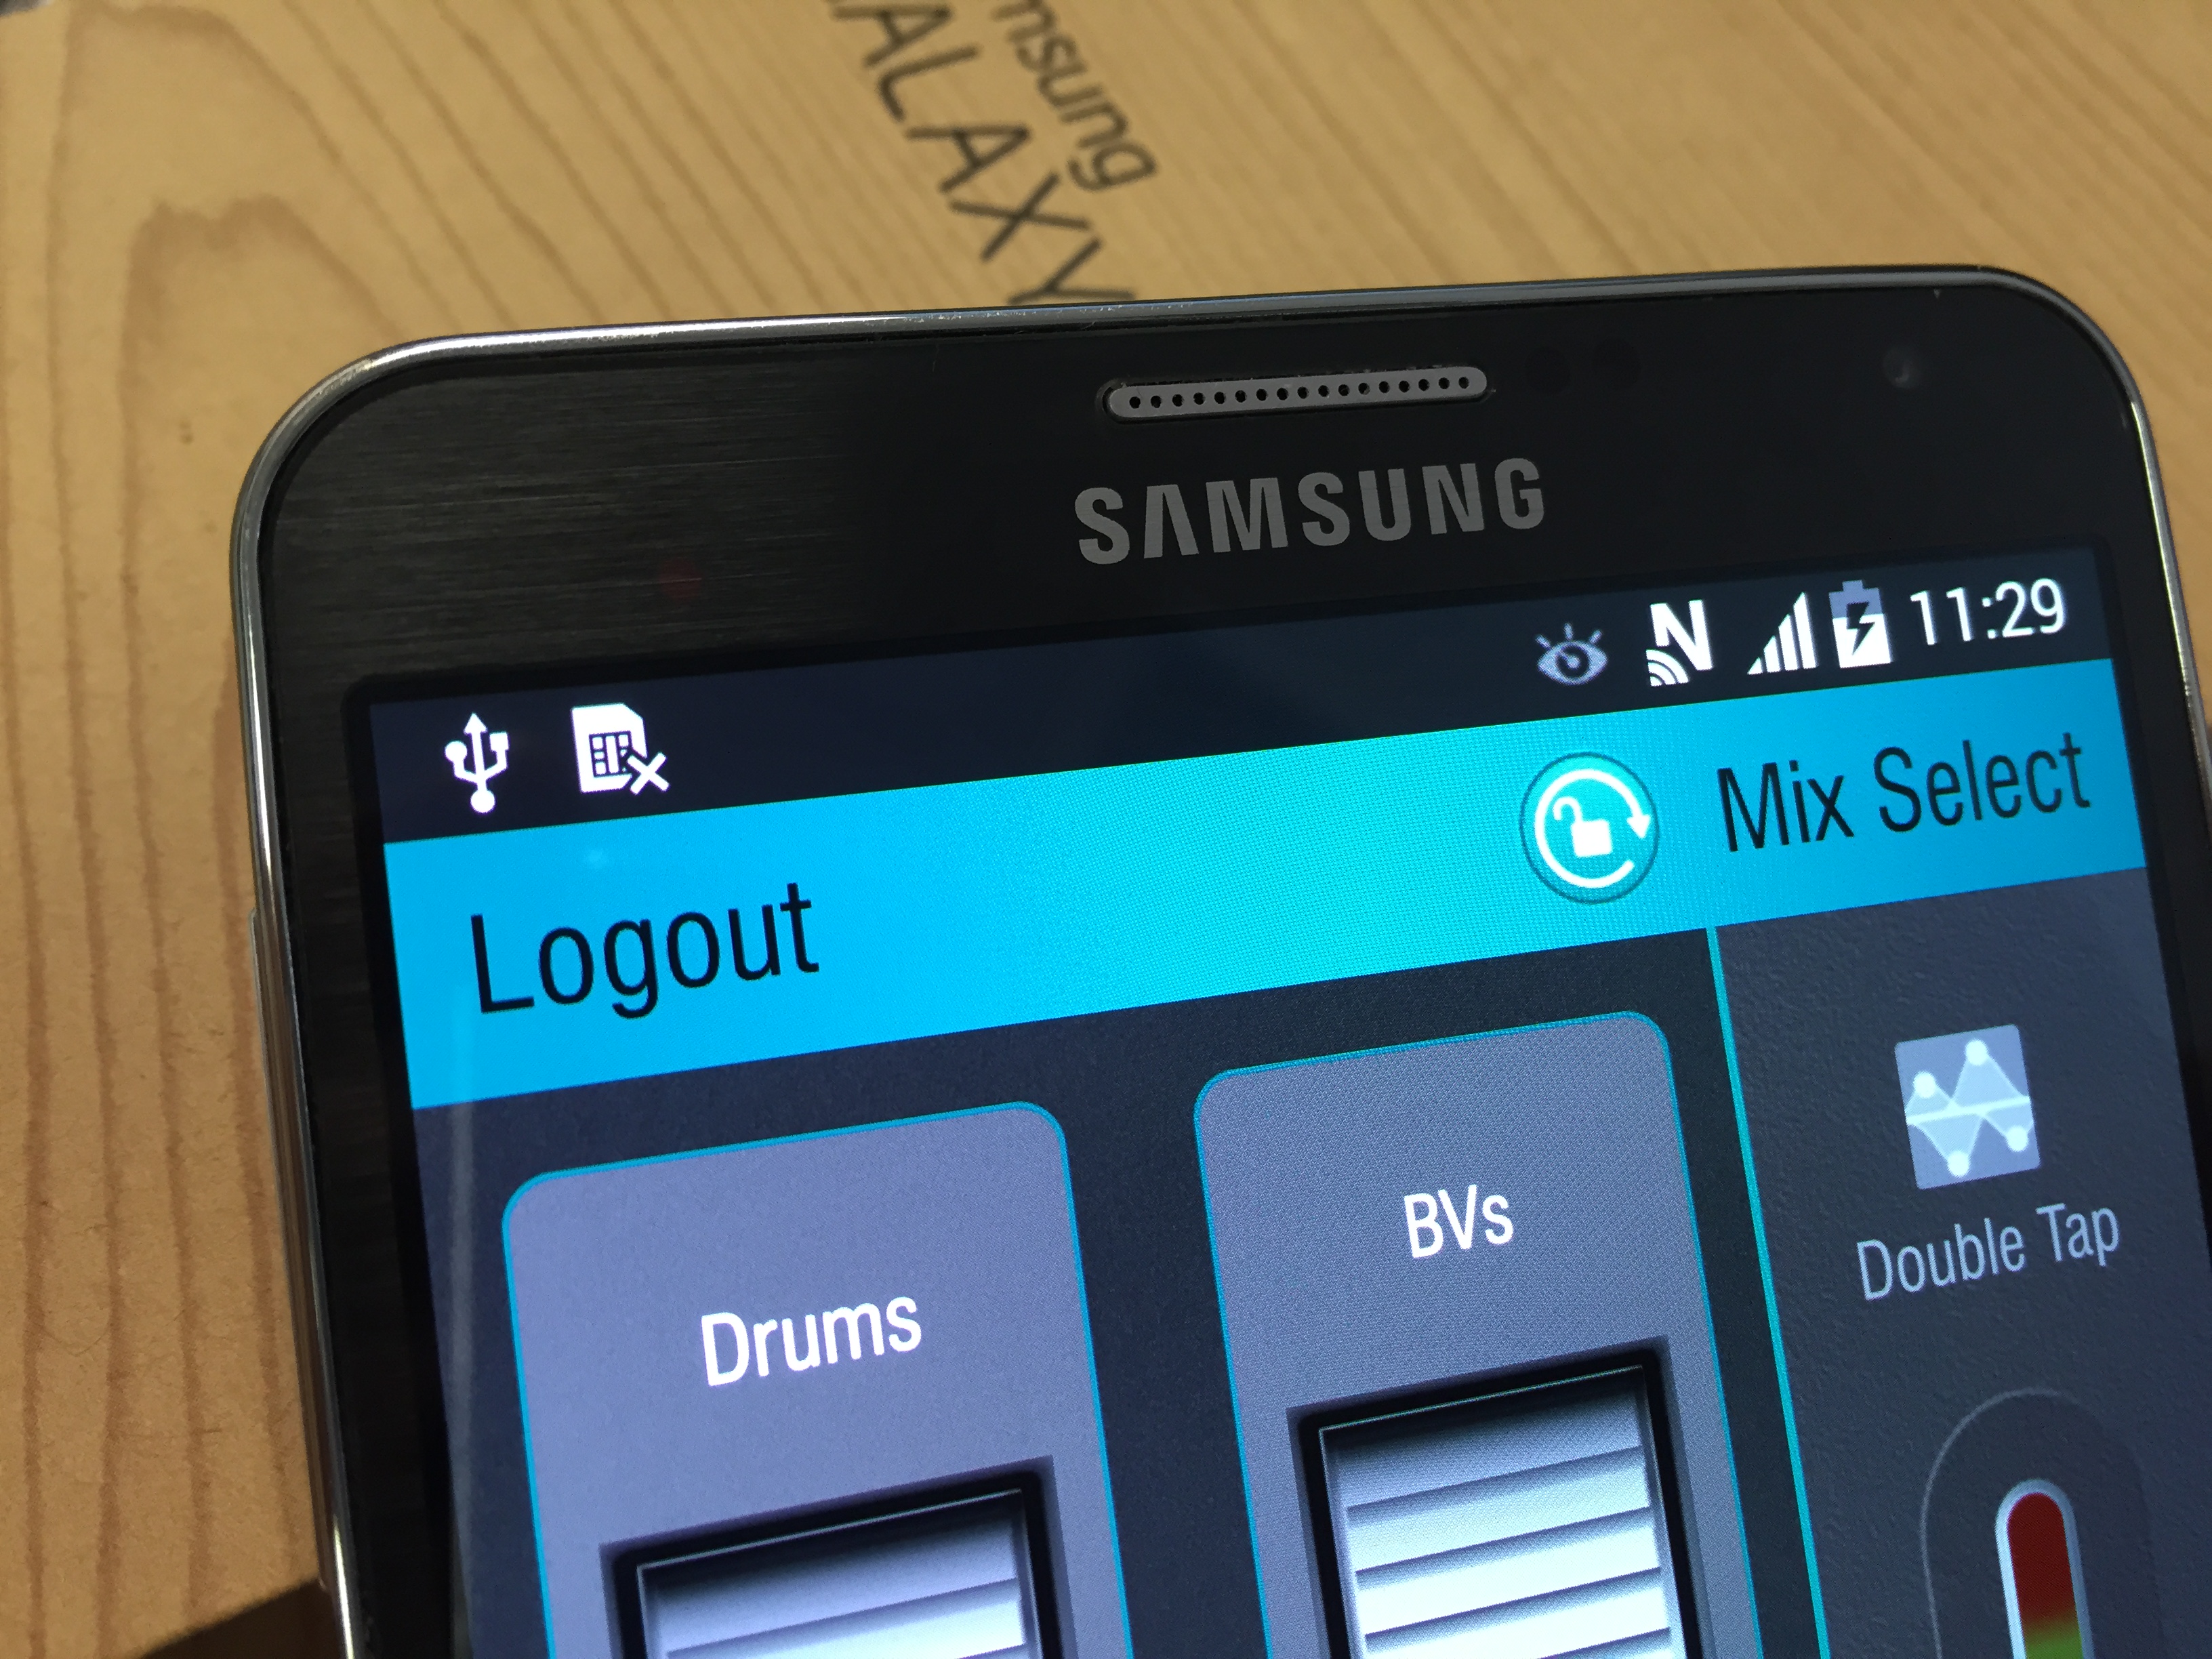
Qu firmware V1.6 and the new Qu-You personal monitor app are out!
Have a look at the new features and find out more on our website.
by Nicola A&H
2014/10/09 in General News
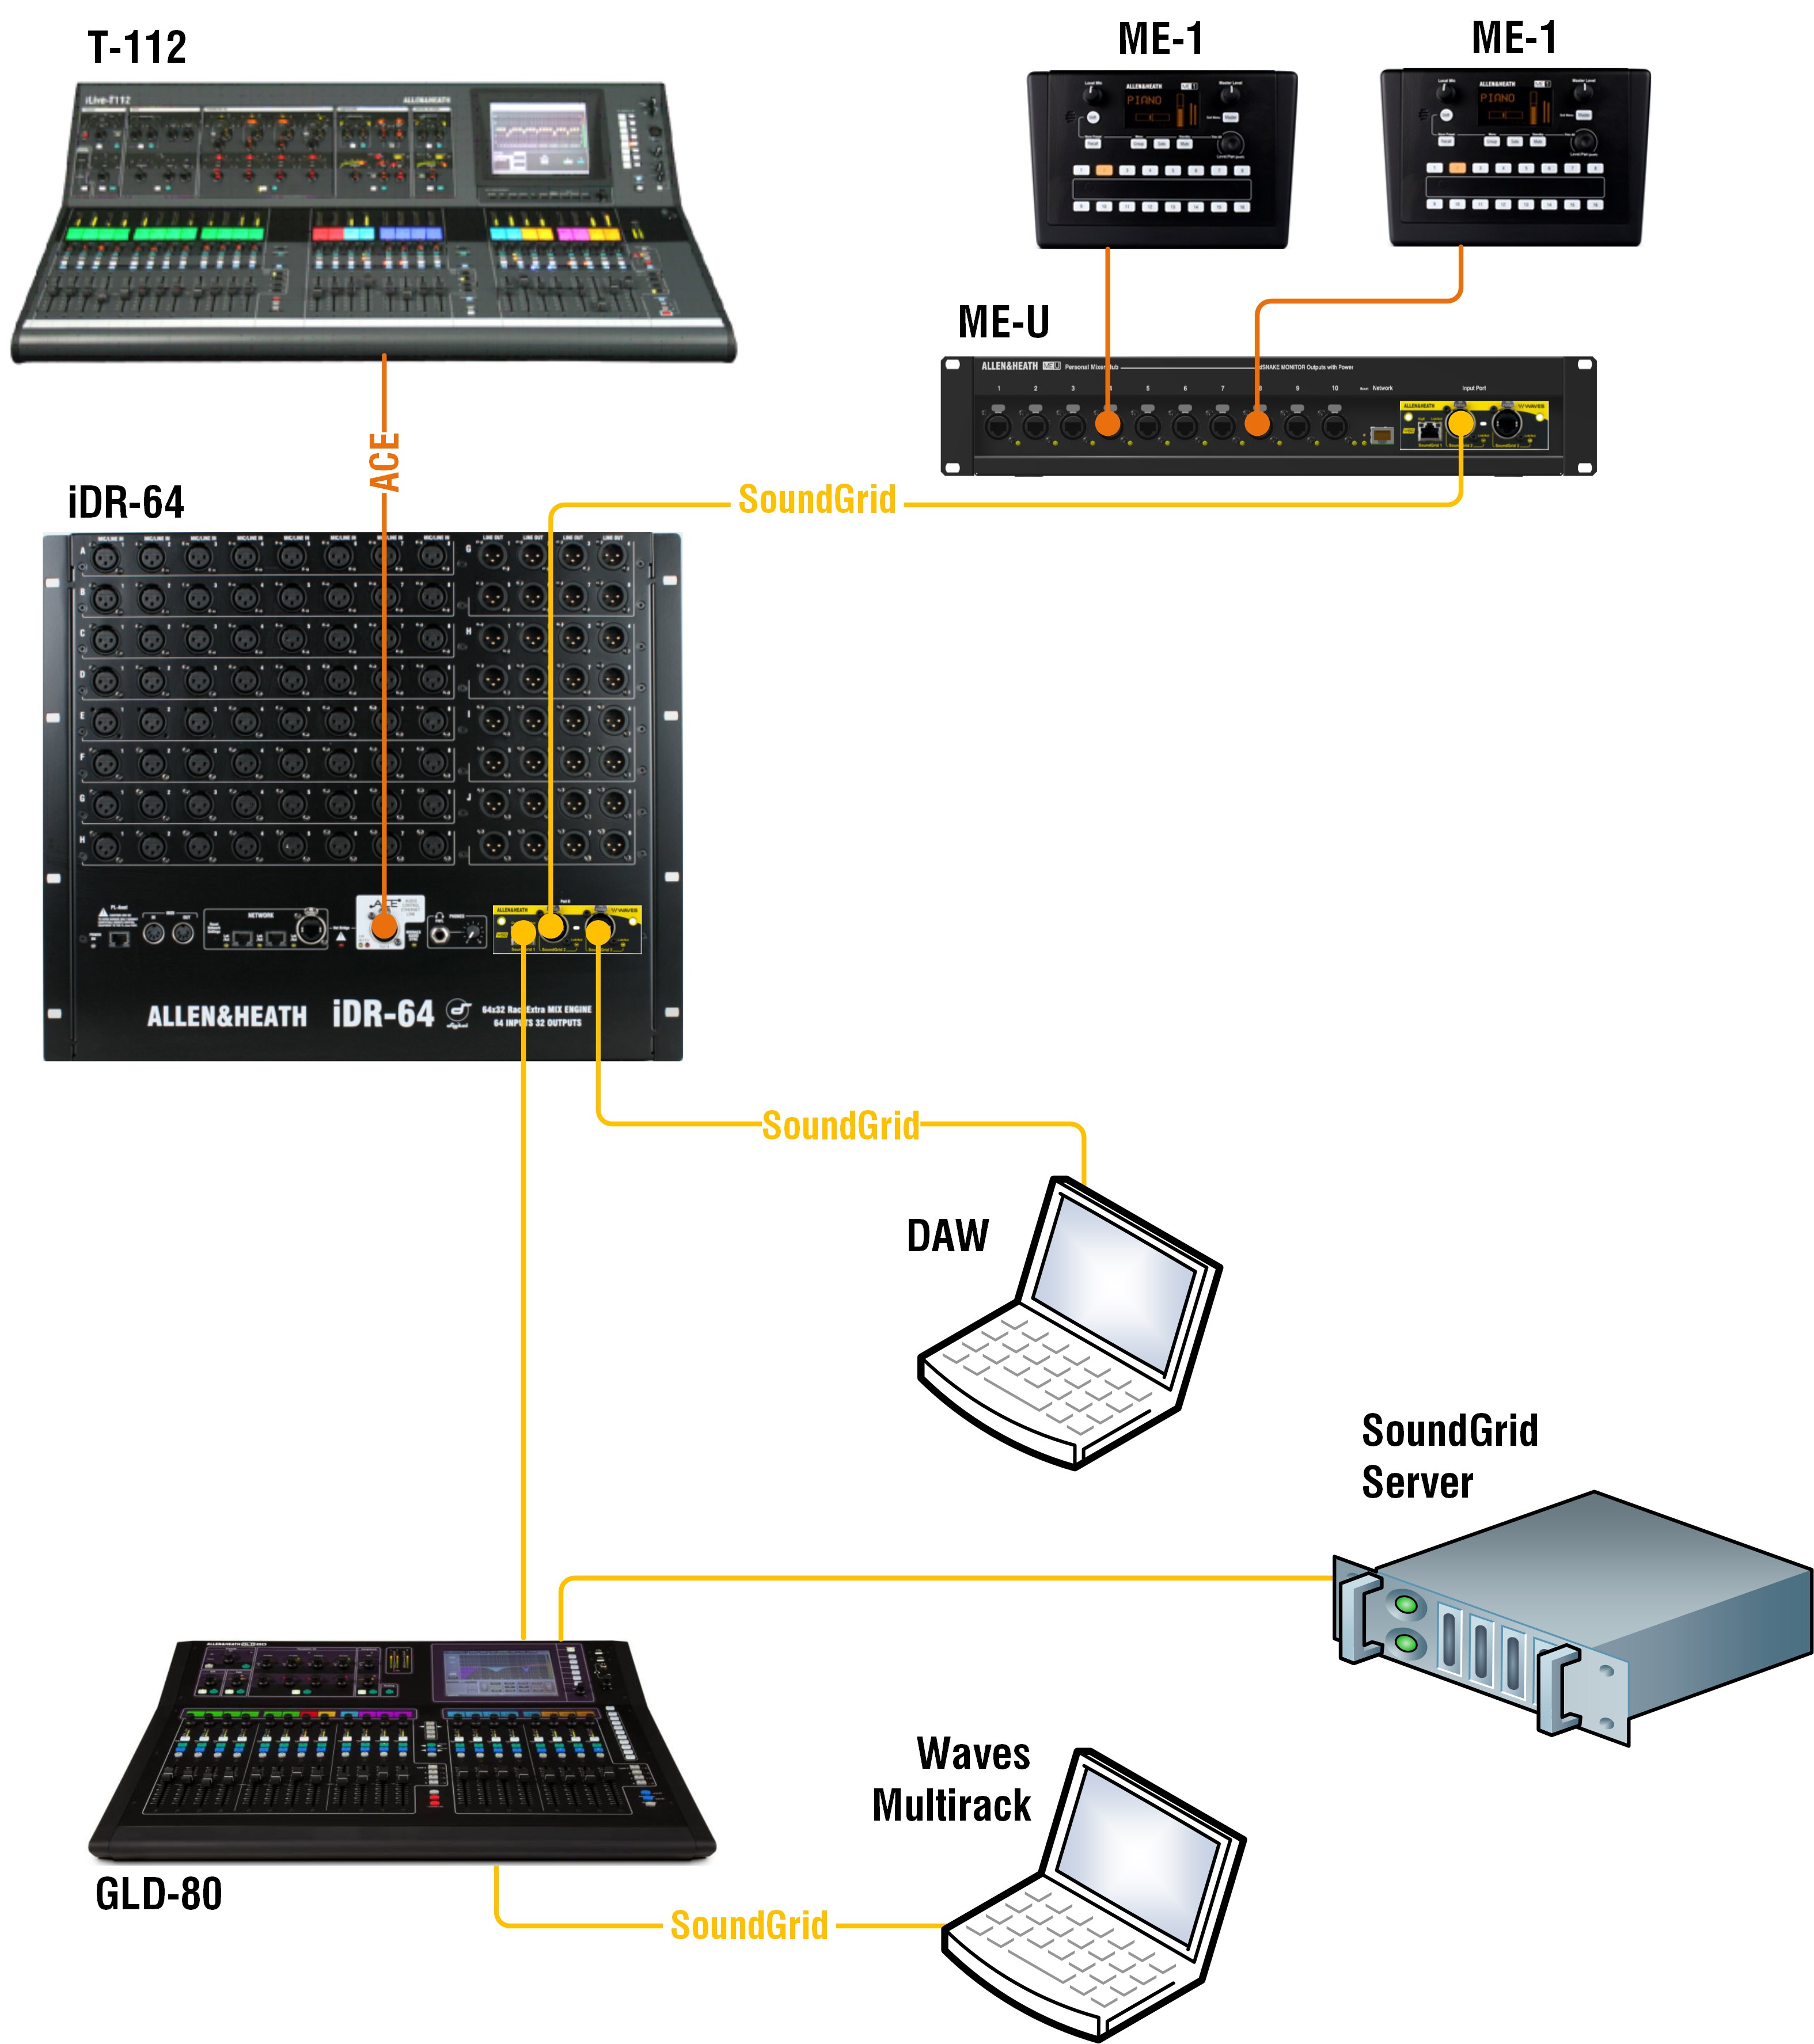
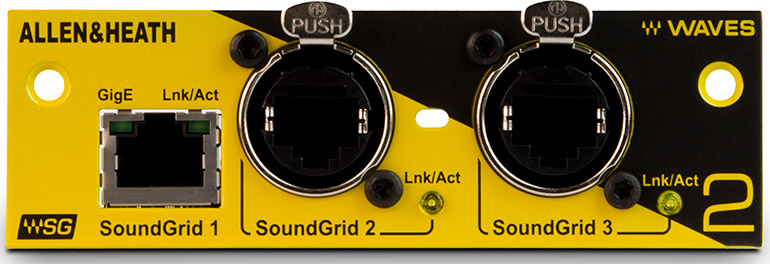
The new M-Waves V2 option card for iLive and GLD adds the ability to sync from the SoundGrid network, opening up endless networking possibilities such as digital mic splitting, audio distribution, FoH and Monitor sharing a single SG Server, and integration with the DiGiGrid range of interfaces and breakout boxes.
A typical application diagram is shown below – here an iLive system mixing monitor on stage is equipped with an M-Waves V2 card. The iLive is sending up to 40 channels to the ME personal mixing system via a SoundGrid connection to the ME-U hub. Up to 64 channels are sent to the GLD system at FoH, where a SoundGrid server is connected for low latency plugin processing. The two mixers can share the same server if required. A laptop running SG Studio is recording up to 64 tracks via a direct Cat5 connection to the M-Waves card, thanks to ASIO / Core Audio drivers. A second laptop running Multirack SG is deployed at FoH for plugin control.
Note – The iLive / GLD network ports can be bridged into the M-Waves card to allow use of iLive Editor / GLD Editor on the same computers running the Waves software.
Note – The iLive is operating as the master clock in the SoundGrid network. The master device can use the original M-Waves card. The slave devices must use the newer M-Waves V2.
For more details please visit the product page or browse the dedicated section on the Waves site here.
by Nicola A&H
2014/08/01 in General News
DiGiCo, Allen & Heath and Calrec announce the formation of a new ProAudio Group.
The DiGiCo team has spent the last 18 months consulting with Electra Partners about the possible combination of both Allen & Heath and Calrec with the DiGiCo family. The culmination of this brings together three British console companies to create a new professional audio group, while retaining their unique skills, customer relationships and the identities of each brand.
James Gordon will become Group CEO supported by a strong and talented management from across the new group. When asked about what this means for the future, James said:
“We have bold plans for the group but it is imperative that each company maintains its own independence and style. None of these brands needs to trade off each other’s technology or reputation.”
“These are three great companies and all the brands currently in the group have enviable reputations for technology, audio quality, reliability and perhaps, most importantly, customer focus and care. The strategy is to share technology and resource across the group and allow some interconnectivity across the product lines.”
“The combined R&D teams are about to enter a new world of possibilities and we intend to take full advantage of their resource, passion and experience. It’s an amazing opportunity for us, and just maybe the whole British Pro Audio industry.”
Glenn Rogers, Managing Director of Allen & Heath, added, “The creation of the group with DiGiCo and their management is an impressive combination. It will certainly add new momentum to what Allen & Heath and Calrec had already planned for the future.”
Henry Goodman, Calrec’s Sales and Marketing Director, commented that “This exciting formation gives Calrec new opportunities for swifter development of a host of ideas we have been wanting to bring to the market. We will have a vast pool of engineers to share new ideas for the industry and target them specifically to each brand’s needs. Customers can expect us to maintain and in some areas improve our very high levels of support and service.”
The complexity of this combination required the effort and support of two of London’s top Private Equity houses. For the first time, Electra Partners and ISIS have pooled resources to support the management with this ambitious vision for the future of UK Pro Audio. Charles Elkington, Investment Partner at Electra Partners, said:
“DiGiCo augments our existing investment in the professional audio sector. We have worked hard over the last 18 months to bring together these three successful businesses. We look forward to working with James Gordon and his team to grow the group, while also preserving the distinctive brand identity and excellent customer relationships of each business.”
by Nicola A&H
2014/04/11 in On Tour
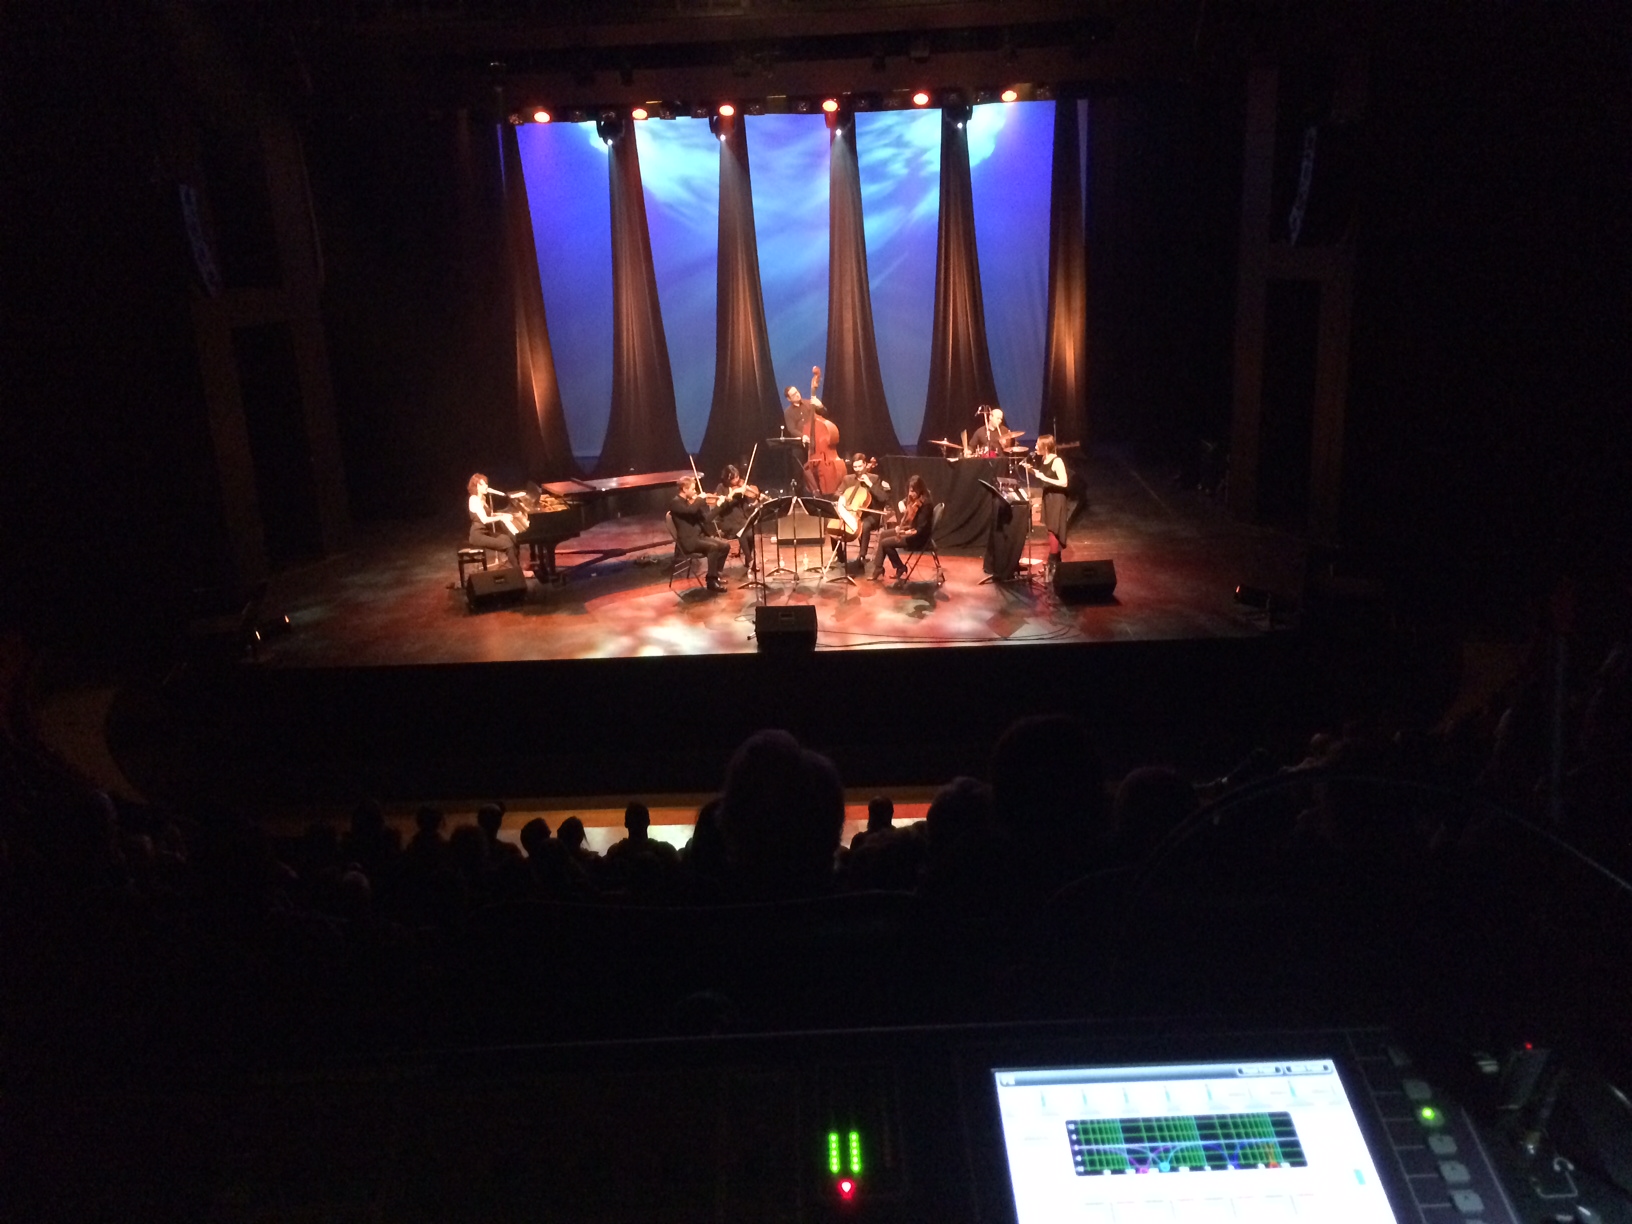
Erikson Pro Product Manager, Claus Frostell has just finished a two weeks tour leg with Sarah Slean, mixing on a GLD system. Here are his comments on Dynamic EQ:
“Had DynEQ on 2 vocals, and the string bus. At the Montreal show they had 8 strings, and when they all start going the DEQ takes the edge off and scoops a nice hole to the low-mids for the vocals to still fit into”.
by Nicola A&H
2014/04/03 in General News
Qu-16 and Qu-24 now support USB streaming to / from Windows computers.
To learn more about V1.4 firmware and other new features included please visit the Qu-16 or Qu-24 pages on the main Allen & Heath website.
by Nicola A&H
2014/03/07 in Tips and Tricks
V1.4 is out and if you haven’t done it yet, check out the list of new features including scene crossfades and embedded scene recalls.
You can learn more about the new Transient Controller, Dynamic EQ and Multiband Compressors in the FX pages.
In this article I want to focus on MIDI and MIDI over TCP/IP.
GLD supports MIDI control via MIDI In and MIDI Out sockets on the rear of the GLD mixer. The same protocol is available for TCP/IP control via the Network port on the rear of the GLD mixer. Either way, the protocol is bidirectional. This means you can control the mixer from third party devices such as Crestron / AMX touchscreens etc. but you can also control external equipment from the GLD. For example, recalling a Scene will send a Program Change message which you can use to change a reverb preset on a System 6000. Should you need to send out a specific MIDI string, one or multiple SoftKeys can be configured for this – go to Setup / Control / SoftKeys, select a SoftKey and choose Custom MIDI (in V1.4 you can choose to transmit a different MIDI message when a SoftKey is pressed and/or when it is released).
A specification document for the MIDI and TCP/IP Protocols is available online.
MIDI Machine Control (MMC) is also provided. Go to the Setup / Control / MIDI screen, where you can also set the MIDI channel for all of the above. Hook up an Alesis HD24 or similar via standard DIN MIDI cables, and you can easily remote the transport controls.
So far, so good. The news is, V1.4 lets you assign up to 32 Fader strips to MIDI Strips. MIDI Strips can be named and coloured. They are stored within Scenes and can be made Safe from Scene recall. More importantly, each control on these strips can be made to transmit a custom MIDI message. This is ideal for controlling a slave mixer, parameters on external equipment such as effects devices, or DAW software as we will see later.
The Template Shows load factory default messages for the MIDI Strip controls. These are detailed in the same specification document mentioned above, and can be restored by recalling Scene 498 within a Template Show. Users familiar with MIDI will notice the use of simple Note and Control Change messages, which are more widely used (and more easily mapped to a DAW) compared to the NRPN messages used elsewhere in the mixer.
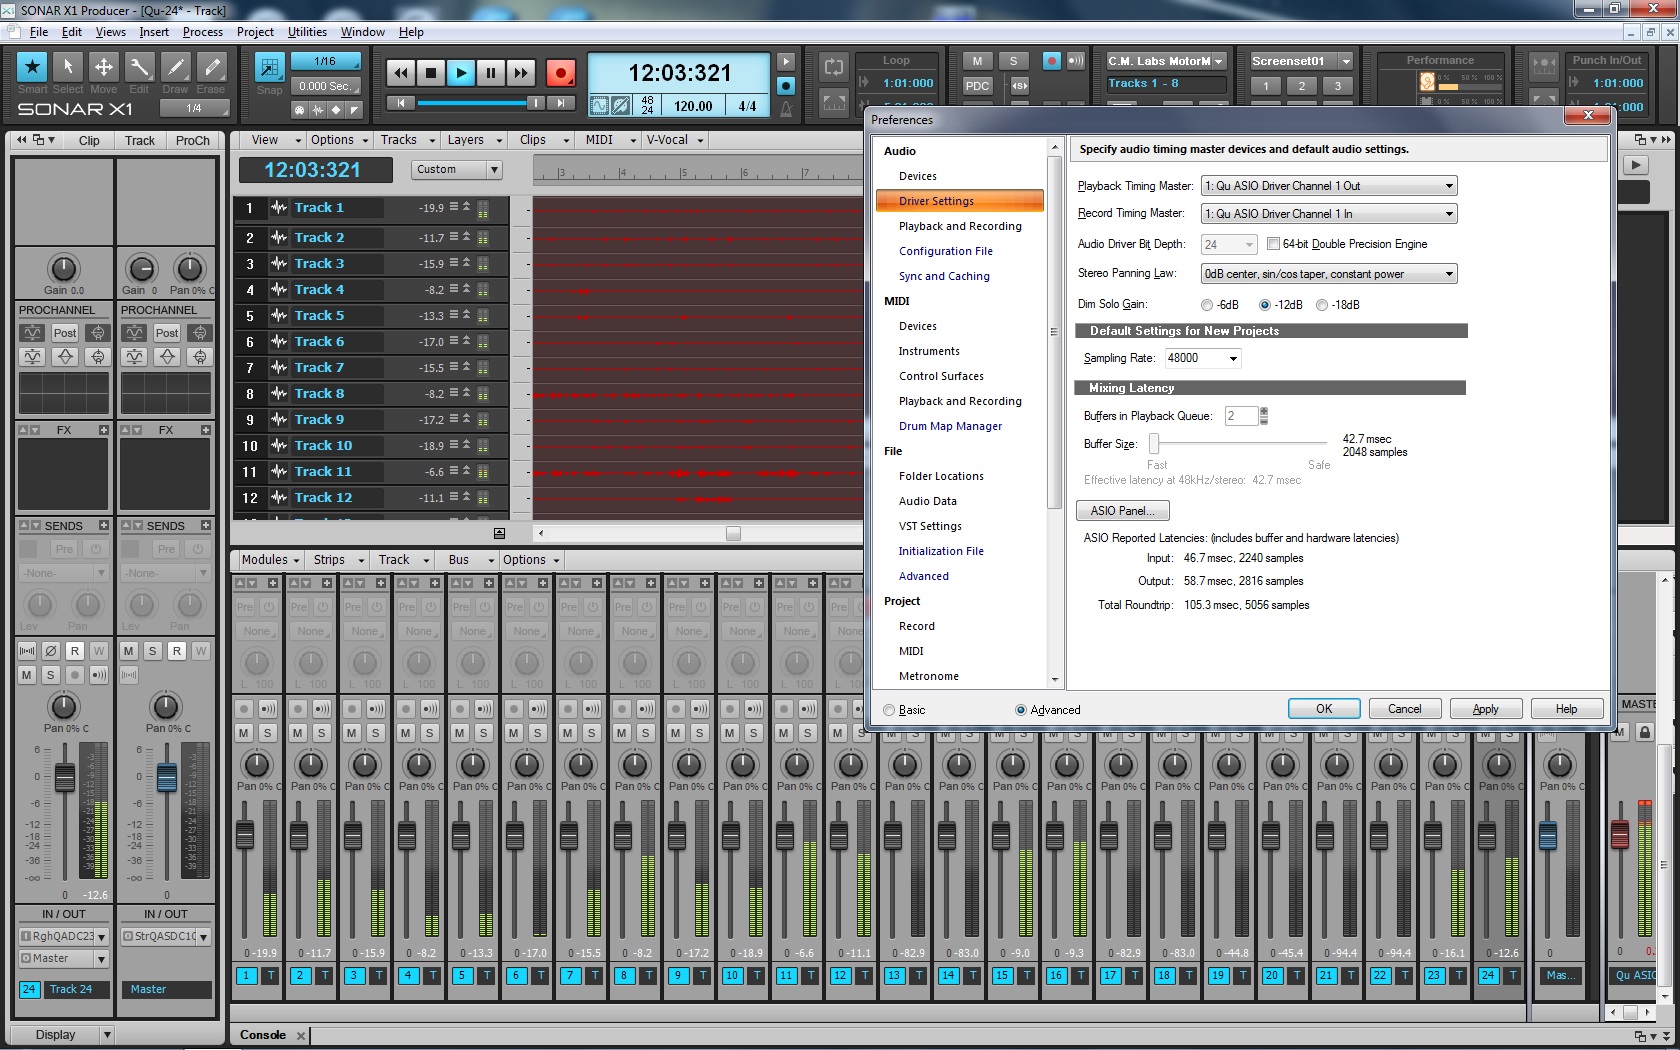
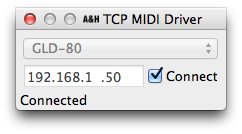
Last year we released a driver to allow the MIDI Protocol to be communicated over an Ethernet connection to a Mac computer. Once launched, an A&H icon appears in the tray and gives access to the configuration panel. A drop-down box allows selection of compatible A&H mixers on the network. Note that the Mac and the mixers must be set to unique IP addresses within the same subnet. A Custom option lets you type in the IP address.

The TCP MIDI Driver will create a virtual MIDI port in OS X. This can be used to manually assign GLD controls to DAW parameters such as track levels, mutes etc. Also, it makes the GLD MMC transport controls available to this virtual MIDI port. For example, enable the AH TCP MIDI input and output ports in Reaper (Preferences / MIDI Devices) to control the DAW transport from the GLD.
The new DAW Control driver allows compatible A&H mixers to control a DAW using popular HUI or Mackie Control protocols. It works similarly to the TCP MIDI Driver, albeit with two major differences:
As a result, it is much easier to set up control of levels, mutes, solos of multiple DAW tracks. A set of instructions for several major DAWs is available here.
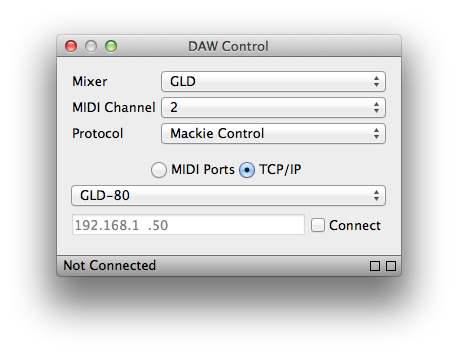
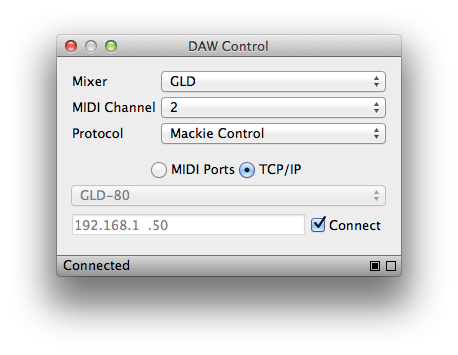
Note that DAW Control can be used as an alternative to or ON TOP OF the TCP MIDI Driver. For example you might still want custom MIDI messages (from the SoftKeys or MIDI Strips) to trigger particular events or control certain parameters in the DAW software, perhaps your Cubase master bus or FX sends.
Enough for DAWs now, but not quite finished with MIDI yet. Say you have a 30 piece orchestra making an appearance at the next gig. A shame you are already using 40+ channels on your GLD for the main band, speakers and guests. You hire in an iLive iDR-32 but there is no room (or budget) for a second surface at FoH. You have the MixPad app running on your iPad but you wish you could tweak the orchestra mix from the GLD too.
This can be done by MIDI linking the two devices via standard MIDI DIN cables. GLD and iLive use a very similar MIDI Protocol. If on the same MIDI channel, changes to GLD ch 1 level, mute etc. will be mirrored on iLive ch 1. Recalling Scene 1 on GLD will recall Scene 1 on the iLive, and so on. This is of limited use for the purpose of our example, so bear with me a moment.
Let’s set the MIDI channel on the GLD to 2 in the Setup / Control / MIDI screen. Now the two systems are not mirrored, and we can decide what exactly we want to control in the iLive by customizing our 32 MIDI Strips. We should start by studying the iLive MIDI Protocol, to find out for example that:
Our GLD MIDI Strips need to fire out (and respond to) messages on MIDI ch 1. If we were to set MIDI Strip 1 to control ch 1 on iLive, this will look like:
For a starting point you might want to have a look at the Show file I’ve just uploaded in the GLD Libraries.


