You are browsing the archive for Tips and Tricks.

IP6 and IP8 programming examples

2016/08/31 in Tips and Tricks

The IP6 and IP8 open up a new world of applications for dLive. If you haven’t heard of them yet, check them out on our website here and here. The dLive Firmware Reference Guide is a useful resource to understand how they are programmed, for example the difference in setting an IP remote under the Surface or MixRack menu (regardless of where it is physically connected).
This article takes some of the typical applications of IP remote controllers and describes how you would go about configuring them. Each application is available as an example Scene in a dLive Show file here.

IP6 or IP8 for volume control in a venue
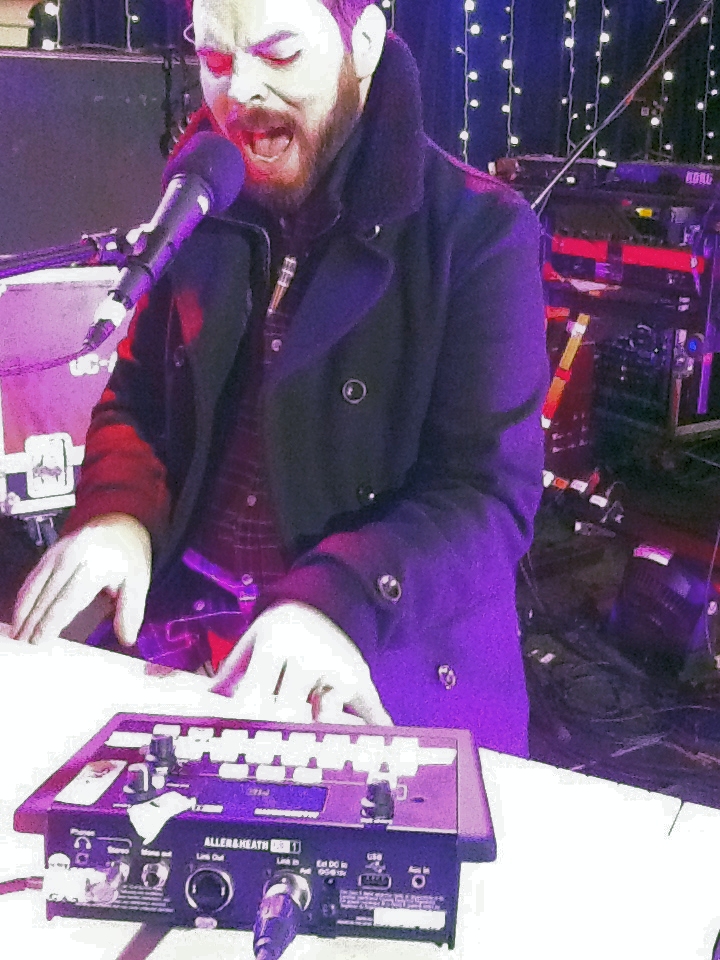
Let’s start with the basics and assume you want an IP6 to provide control for day-to-day, untrained operators in a venue. For example, to set the levels of microphones and music sources. I would set this up under MixRack / IP Controller so that the IP6 will work with or without a dLive Surface.
In the Quick Setup tab, I can hold down the Setup key (or click Setup in Director) and touch on the screen to customise the set of functions I want to assign to the IP6 strips, prior to assigning the strips. I will leave the Mix Channel Type to the default setting (Main LR), and set the Upper Strip Key Function to Mute, and the Lower Strip Key Function to… well, for the time being, Unused.
Now I can close the menu, choose the number of Layers (1 is enough for this example), and drag n drop the strips I want. I can test everything it’s working as expected in the Simulator tab, even before a physical device is connected.
I can also go to the Advanced tab, and change any key or rotary function individually. In this example we have two rows of unused keys so you might want to set these to recall specific Scenes for different uses of the room (conference, cinema, presentation) or source selection.

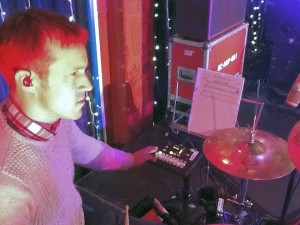
IP6 for personal monitoring
The IP6 makes a perfect personal monitoring controller. All you need to do is assign the Send levels and Pans of multiple channels or groups to a specific mix.
Set this up under MixRack / IP Controller. In the Quick Setup tab, customise the set of functions (prior to assigning the strips) as follows: Mix Channel Type to Stereo Aux 1, Upper Strip Key Function to Send Level Up, Lower Strip Key Function to Send Level Down, and Rotary Shift Function to Pan. You don’t want Mutes or PAFL here because they would be somewhat disruptive to the FoH mix! Close the menu, choose the number of Layers (let’s use all 6 now), and drag n drop the strips. Again we can use the Simulator tab to check it all went according to plan. This IP6 will now control the monitor mix for Stereo Aux 1. The two rows of keys on the strips can be used as an alternative mean of tweaking levels i.e. as a ‘more me’ or ‘more bass’ button. The bottom row of keys will select the Layer.

Personal monitoring is contagious. Once you have one on stage, everybody else will want the same, so get ready to set up multiple IP remotes. They key thing here is remembering that each one will need its own unique IP address and, preferably, name. You can do this by connecting them one by one on the dLive and configure their Unit Name and Network settings using the IP Controller screen, OR by connecting a laptop directly to the units and pointing your browser to the default IP address 192.168.1.72 (IP6) or 192.168.1.73 (IP8). The Getting Started Guide in the box goes through all of this.

IP8 as a Surface extender / sidecar
On to another interesting application. Say I’m a monitor guy and I want to use as many strips as possible on my Surface for Inputs, while the IP8 controls my Aux master levels. This time I want to set up the IP8 under Surface / IP Controller, so that it shares the Sel and Mix functions with the dLive Surface. I can customise the set of functions in the Quick Setup tab (prior to assigning the strips) as follows: Mix Channel Type to Main LR, Upper Strip Key Function to Sel, and Lower Strip Key Function to Mix. I’ll set the number of Layers and drag n drop all my Aux master strips. As you can see in the Simulator tab, this IP8 now controls my Aux master levels. Pressing Sel on an Aux master will select that Aux for processing control on the dLive Surface (for example to tweak a GEQ). Pressing Mix on an Aux master will make the Aux the active mix on the dLive Surface (sends on faders).

IP8 and Director – a great combo
More and more engineers are interested in a ‘flyable’ solution for tours and festivals. A number of them are happy to mix on a laptop or tablet running dLive Director, but some lack the tactile control of real faders. Not a problem if you have an IP8 in your bag. In Director, I’ll set up an IP8 under Surface / IP Controller, so that it shares the Sel and Mix functions with the Surf… erm, Director (confusingly). I can customise the set of functions in the Quick Setup tab (prior to assigning the strips) as follows: Mix Channel Type to Main LR, Upper Strip Key Function to Mute, and Lower Strip Key Function to PAFL. Or I can choose to assign the Lower Strip Key Function to Sel, so that pressing Sel on a strip will select the channel in Director! Finally I’ll set the number of Layers to 6 and drag n drop up to 48 channels or masters.

What about controlling multiple monitor mixes?
One thing to note is that the Mix function on IP remotes will only change the active Mix in the dLive Surface or Director. It does NOT change the functions of the faders on the IP remote i.e. there is no ‘sends on faders’ flip on IP remotes – at the moment of writing (firmware V1.3) all faders / rotaries are statically assigned to a function. The workaround to control multiple mixes on a single IP remote is to use Scenes. You can prepare a bunch of Scenes which recall different assignments to the IP device, for example the same inputs but Scene X is Main LR levels, Scene Y is sends to Aux1, Scene Z is sends to Aux2 etc. Then use a spare row of keys to recall these Scenes. I’ve done this with Scene 13 and higher in the example Show file (see IP6 under MixRack / IP Controller).
Note that by default the IP assignments are Safe in the Global Scene Safes, to prevent unwanted changes to the IP behaviour at Scene recall. For this example to work however, you want them to follow Scene automation (not Safe). You also want the specific Scenes you created to Block Everything BUT the IP Assignments in their Recall Filters, so they won’t affect anything else.

Sounds complicated? Take a look at the example Show file here (I’ve used the first IP location in each example, either in Surface or MixRack as described above) and if you are in trouble, get in touch with Support and we’ll be happy to help.

GLD V1.4 and the power of MIDI

2014/03/07 in Tips and Tricks

V1.4 is out and if you haven’t done it yet, check out the list of new features including scene crossfades and embedded scene recalls.
You can learn more about the new Transient Controller, Dynamic EQ and Multiband Compressors in the FX pages.

In this article I want to focus on MIDI and MIDI over TCP/IP.

GLD_MIDI

The MIDI and TCP/IP Protocols

GLD supports MIDI control via MIDI In and MIDI Out sockets on the rear of the GLD mixer. The same protocol is available for TCP/IP control via the Network port on the rear of the GLD mixer. Either way, the protocol is bidirectional. This means you can control the mixer from third party devices such as Crestron / AMX touchscreens etc. but you can also control external equipment from the GLD. For example, recalling a Scene will send a Program Change message which you can use to change a reverb preset on a System 6000. Should you need to send out a specific MIDI string, one or multiple SoftKeys can be configured for this – go to Setup / Control / SoftKeys, select a SoftKey and choose Custom MIDI (in V1.4 you can choose to transmit a different MIDI message when a SoftKey is pressed and/or when it is released).

A specification document for the MIDI and TCP/IP Protocols is available online.

MIDI Machine Control (MMC) is also provided. Go to the Setup / Control / MIDI screen, where you can also set the MIDI channel for all of the above. Hook up an Alesis HD24 or similar via standard DIN MIDI cables, and you can easily remote the transport controls.

MIDI Strips

So far, so good. The news is, V1.4 lets you assign up to 32 Fader strips to MIDI Strips. MIDI Strips can be named and coloured. They are stored within Scenes and can be made Safe from Scene recall. More importantly, each control on these strips can be made to transmit a custom MIDI message. This is ideal for controlling a slave mixer, parameters on external equipment such as effects devices, or DAW software as we will see later.

The Template Shows load factory default messages for the MIDI Strip controls. These are detailed in the same specification document mentioned above, and can be restored by recalling Scene 498 within a Template Show. Users familiar with MIDI will notice the use of simple Note and Control Change messages, which are more widely used (and more easily mapped to a DAW) compared to the NRPN messages used elsewhere in the mixer.

TCP MIDI Driver

Last year we released a driver to allow the MIDI Protocol to be communicated over an Ethernet connection to a Mac computer. Once launched, an A&H icon appears in the tray and gives access to the configuration panel. A drop-down box allows selection of compatible A&H mixers on the network. Note that the Mac and the mixers must be set to unique IP addresses within the same subnet. A Custom option lets you type in the IP address.

Screen Shot 2014-02-19 at 12.25.16Screen Shot 2014-02-19 at 12.25.31

The TCP MIDI Driver will create a virtual MIDI port in OS X. This can be used to manually assign GLD controls to DAW parameters such as track levels, mutes etc. Also, it makes the GLD MMC transport controls available to this virtual MIDI port. For example, enable the AH TCP MIDI input and output ports in Reaper (Preferences / MIDI Devices) to control the DAW transport from the GLD.

DAW Control

The new DAW Control driver allows compatible A&H mixers to control a DAW using popular HUI or Mackie Control protocols. It works similarly to the TCP MIDI Driver, albeit with two major differences:

  • The set of factory default messages from the MIDI strips is translated to a corresponding HUI or Mackie Control message.
  • Multiple virtual ports named DAW Control MIDI n are created (use one for each block of 8 strips).

As a result, it is much easier to set up control of levels, mutes, solos of multiple DAW tracks. A set of instructions for several major DAWs is available here.

Screen Shot 2014-02-19 at 13.06.17Screen Shot 2014-02-19 at 13.06.36

Note that DAW Control can be used as an alternative to or ON TOP OF the TCP MIDI Driver. For example you might still want custom MIDI messages (from the SoftKeys or MIDI Strips) to trigger particular events or control certain parameters in the DAW software, perhaps your Cubase master bus or FX sends.

Submix on a GLD or iLive

Enough for DAWs now, but not quite finished with MIDI yet. Say you have a 30 piece orchestra making an appearance at the next gig. A shame you are already using 40+ channels on your GLD for the main band, speakers and guests. You hire in an iLive iDR-32 but there is no room (or budget) for a second surface at FoH. You have the MixPad app running on your iPad but you wish you could tweak the orchestra mix from the GLD too.

This can be done by MIDI linking the two devices via standard MIDI DIN cables. GLD and iLive use a very similar MIDI Protocol. If on the same MIDI channel, changes to GLD ch 1 level, mute etc. will be mirrored on iLive ch 1. Recalling Scene 1 on GLD will recall Scene 1 on the iLive, and so on. This is of limited use for the purpose of our example, so bear with me a moment.

Let’s set the MIDI channel on the GLD to 2 in the Setup / Control / MIDI screen. Now the two systems are not mirrored, and we can decide what exactly we want to control in the iLive by customizing our 32 MIDI Strips.  We should start by studying the iLive MIDI Protocol, to find out for example that:

  • BN, 63, CH, BN, 62, 17, BN, 06, LV   controls fader levels, where N is the MIDI channel, CH is the iLive channel (see table in the spec document), and LV is the value.
  • 9N, CH, xx, 9N, CH, 00   (Note On followed by Note Off) controls mutes, where xx >40 is Mute On, <40 is Mute Off.
  • BN, 63, CH, BN, 62, 19, BN, 06, GV   controls preamp gains, where GV is the value.

Our GLD MIDI Strips need to fire out (and respond to) messages on MIDI ch 1. If we were to set MIDI Strip 1 to control ch 1 on iLive, this will look like:

  • B0, 63, 20, B0, 62, 17, B0, 06, <VAR>   where <VAR> is the variable value from the MIDI Strip.
  • 90, 20, <VAR>, 90, 20, 00
  • B0, 63, 20, B0, 62, 19, B0, 06, <VAR>

For a starting point you might want to have a look at the Show file I’ve just uploaded in the GLD Libraries.

ME Personal Monitor

2013/11/27 in Tips and Tricks

Gaz_Union_Chapel_0030_LR

Impressed by its solid construction, no-nonsense set up and navigating menu, flexible mounting options, and choice of interface via the ME-U hub, the ME-1 personal monitoring solution is starting to turn a few heads (hopefully not at the engineer!).
Recently FOH engineer Gavin McComb tried out a set on the Gaz Coombes UK tour. Once the units were set up and programmed (which you do locally on the mixers themselves – saving the file to a USB key), The musicians had access to 40 ch of audio signals coming in from the mixer. These can be mixes, FX, groups, mic pre-splits or channel direct outs. Custom ‘DCA’ sub groups can be set up for each and every user. So each musician can access what they want using just a few keys. Presets of setups can be stored and recalled locally too! here’s some pics of the guys using ME-1s at rehearsals:

GC w MECC w MELC w ME


If its a GLD mixer or iLive (via the ME-U) then channel names will automatically be displayed on the ME-1s. For third-party and customisation duties, the ME-U has a browser interface allowing channels to be renamed as needed. Option cards for ME-U are the same as iLive / GLD: Dante, Madi, EtherSound. The ME-U ships with an ME-D card which takes signals from ACE (iLive), dSNAKE GLD & QU, & AVIOM TM.
ME-U has 10 ports all with ‘Ethercon’ connectors and P.O.E allowing the ME-1s to take power down the cat5 cable. Otherwise each unit can be powered locally by a wall-wart PSU. ME-U runs pretty silent in its rugged 2U case making it ideal for stage or installation.
Other useful tips about ME-1; They have a really good loud headphone output! There is a local mic built in with direct feed-in volume to allow users to listen to locals when wearing earpieces. The display is back-lit.

Multiple iLive Softkey App

2013/05/23 in Tips and Tricks


Muliple iLive SoftKey App

Allen & Heath iLive Softkeys expansion with TCPIP Remote app

Thanks to Stix (Richard Howey) for this tip and video.

YouTube clip: https://youtu.be/1kaPNjQz5pY


Squeeze more out of Multi-Band Compression

2013/05/10 in General News, Tips and Tricks

MBD4 IEM Glue


In this post we take a look at the Multi-band Compressor introduced to the iLive FX rack in V1.90. If you read my previous post on the DynEQ4 then you will know that soundman Ben Booker has created some presets for the Dynamic FX units and these are now in the library when you install V1.91.

There are two compressor models in the rack:

Multi_BD3

MultiBD3
The 3-band compressor is geared towards mix mastering, where a shallow 6dB slope is more commonly used giving flat band summing and in phase summation. This provides minimal phase distortion, minimal latency and above all natural sounding transient behavior.

MultiBD4

MultiBD4
The 4 band compressor is geared for instrument processing, where the tight slopes are critical for frequency isolation between the 4 spectral bands. Again all slope filters are carefully designed to sum flat. The choice between 6, 18 and 24 dB is a user selectable parameter – the user can decide based on the required band isolation needed for that instrument and compression scenario and also keep phase distortion minimal. So it is possible to have aggressive compression in adjacent bands and still keep phase distortion minimal.

MBD4 slope 6 combi


MBD4 slope 18 combi


MBD4 slope 24 combi


The user can choose the type of ballistics from Peak or RMS, or in auto mode, Opto or Auto Punch.The gain reduction curve shows the actual real world summing of the compressor bands. Some multiband compressors don’t show the real emulated summation.  In some cases audible colouration can be produced if the actual summed frequency response isn’t flat due to the settings of the frequency bands. On our Multiband compressor GUI, the band summation response from the settings is calculated and displayed – you see what you get!

The ‘iLive Rack FX’ pdf download explains the different controls and indicators that are found on the GUI for the MultiBD3&4

You will find some multiband compressor presets created by Ben Booker in the V1.91 library, Ben says “Multiband compressors can fix many problems in the audio world as long as low ratios and little gain reduction are used. They can also sculpt the sound by turning frequency bands up and down individually.”

MDB3 Honky Bass

Dynamic Equaliser gets a boost!

2013/05/03 in General News, Tips and Tricks

DynEQ off micV1.9 introduced for the first time, emulations of dynamics processors which can be loaded into the 8 FX engines. With the ‘time varying’ effects such as reverb, delay, chorus, ADT etc its fairly easy to try different settings to hear how they affect the instrument or signal, it can also be good fun and can be a ‘creative’ experience enhancing the production of the mix to reproduce what the artist did on the recording, or create a musical sonic atmosphere to suit the performance. But for Dynamic Equalisation and Multi-band Compression the setup, control, and outcome of the ‘effect’ requires a deeper understanding of the principles of sound engineering and more of a prescriptive approach to handle certain signal conditions. Check out V1.91 on the A&H site – the boffins have asked soundman Ben Booker to provide some libraries for these units with brief explanations of how they work. Now you can pull them out of your engineer’s toolbox when you need a fix, or some ‘fairy dust’ in your mix!

MBD4 IEM Glue

Ben says: “The Dynamic EQ and Multiband Compressors are very powerful and flexible tools for the audio engineer. The skill required from the engineer is to use small amounts of EQ and compression to achieve the desired results and to learn from experience when and how to get the best from these sophisticated processors.”

Spectral Compression

Spectral Compression
You can cut a frequency range when the audio level in that band is above a level threshold – reduce high level energy in a frequency band.

Spectral Enhancement
You can boost a frequency range when the audio level in that band is below a level threshold – enhance low level energy in a frequency band.

Spec Gating edit

Spectral Gating
You can cut a frequency range when the audio level in that band is below a level threshold – reduce low level energy in a frequency band.

Spec highlight edit

Spectral Highlighting
You can boost a frequency range when the audio level in that band is above a level threshold – enhance high level energy in a frequency band. (careful with this one!)

The ‘iLive Rack FX’ pdf download explains the different controls and indicators that are found on the GUI for the DynEQ4

Ben Says: “Dynamic EQ should be used with great care. Limited amounts of expansion (sound gets louder above or below threshold) and compression (sound is reduced above or below threshold) should be used. It’s worth spending some time with the presets and learning the functions of this impressive tool. The results are worth it and will give your final mix the polish it needs.”

We’ll look inside the Multi-band Compressor in another post


Editor Hardware

2012/08/06 in Tips and Tricks

Using Editor with an iLive MixRack and need a few faders, rotaries and buttons? Why not try the Xone K2 Midi controller which is a bus-powered device which you can hook up to the computer running Editor. Right-click on the on-screen element to map it to the K2 (for example a mic preamp gain control to a rotary, pad to a button etc). K2 comes with a zipped hard-shell case.

20120806-150137.jpg

TCP/IP Remote

2012/08/06 in Tips and Tricks

With third-party control introduced in V1.80 you can set up some handy interfaces. For example remote scene changes over the network (WiFi) connection. Click on the picture so see a clip of TCP/IP Remote being used to recall scenes using iPad/Pod.

The protocol for this is available from iLive downloads:
 https://www.allen-heath.com/UK/CategoryDocuments/iLive%20TCPIP%20Protocol%20V1.8%20iss2.pdf
Installations using touch-screen systems could also employ these codes to control iLive on a network.

PAFL EXT IN

2012/08/01 in Tips and Tricks

Using IEM’s? Can’t hear the foh talkback? Don’t forget the PAFL external input…this routes any specified input directly to your PAFL bus, pre fader (and it’s got a trim). – Jamie Hickey

Graphic EQ on Inputs

2012/08/01 in Tips and Tricks

Having problems using headmics or condensers in monitors? Need to insert a graphic on that channel? No problem..
Simply route the channel to a group. You now have a 31 band geq and an extra 4 band peq.
Use the strip assign to ‘bury’ the input channel on a layer ‘below’ your inputs and in the gap, bring the group fader to the surface. This way you can send the geq’d input to anywhere on the stage without having to navigate to your groups – it just appears where your regular input channel was. – Jamie Hickey