GLD V1.4 and the power of MIDI
2014/03/07 in Tips and Tricks
V1.4 is out and if you haven’t done it yet, check out the list of new features including scene crossfades and embedded scene recalls.
You can learn more about the new Transient Controller, Dynamic EQ and Multiband Compressors in the FX pages.
In this article I want to focus on MIDI and MIDI over TCP/IP.
The MIDI and TCP/IP Protocols
GLD supports MIDI control via MIDI In and MIDI Out sockets on the rear of the GLD mixer. The same protocol is available for TCP/IP control via the Network port on the rear of the GLD mixer. Either way, the protocol is bidirectional. This means you can control the mixer from third party devices such as Crestron / AMX touchscreens etc. but you can also control external equipment from the GLD. For example, recalling a Scene will send a Program Change message which you can use to change a reverb preset on a System 6000. Should you need to send out a specific MIDI string, one or multiple SoftKeys can be configured for this – go to Setup / Control / SoftKeys, select a SoftKey and choose Custom MIDI (in V1.4 you can choose to transmit a different MIDI message when a SoftKey is pressed and/or when it is released).
A specification document for the MIDI and TCP/IP Protocols is available online.
MIDI Machine Control (MMC) is also provided. Go to the Setup / Control / MIDI screen, where you can also set the MIDI channel for all of the above. Hook up an Alesis HD24 or similar via standard DIN MIDI cables, and you can easily remote the transport controls.
MIDI Strips
So far, so good. The news is, V1.4 lets you assign up to 32 Fader strips to MIDI Strips. MIDI Strips can be named and coloured. They are stored within Scenes and can be made Safe from Scene recall. More importantly, each control on these strips can be made to transmit a custom MIDI message. This is ideal for controlling a slave mixer, parameters on external equipment such as effects devices, or DAW software as we will see later.
The Template Shows load factory default messages for the MIDI Strip controls. These are detailed in the same specification document mentioned above, and can be restored by recalling Scene 498 within a Template Show. Users familiar with MIDI will notice the use of simple Note and Control Change messages, which are more widely used (and more easily mapped to a DAW) compared to the NRPN messages used elsewhere in the mixer.
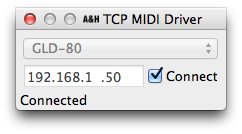
TCP MIDI Driver
Last year we released a driver to allow the MIDI Protocol to be communicated over an Ethernet connection to a Mac computer. Once launched, an A&H icon appears in the tray and gives access to the configuration panel. A drop-down box allows selection of compatible A&H mixers on the network. Note that the Mac and the mixers must be set to unique IP addresses within the same subnet. A Custom option lets you type in the IP address.

The TCP MIDI Driver will create a virtual MIDI port in OS X. This can be used to manually assign GLD controls to DAW parameters such as track levels, mutes etc. Also, it makes the GLD MMC transport controls available to this virtual MIDI port. For example, enable the AH TCP MIDI input and output ports in Reaper (Preferences / MIDI Devices) to control the DAW transport from the GLD.
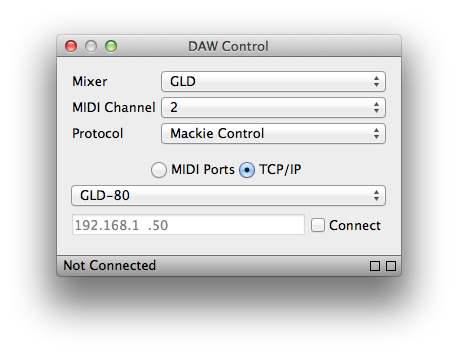
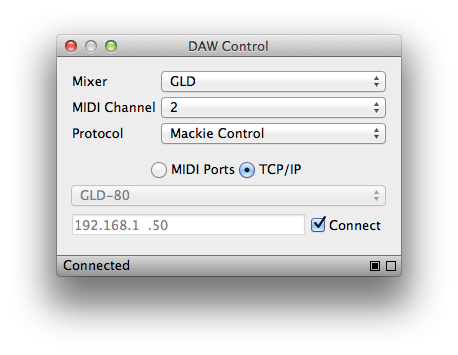
DAW Control
The new DAW Control driver allows compatible A&H mixers to control a DAW using popular HUI or Mackie Control protocols. It works similarly to the TCP MIDI Driver, albeit with two major differences:
- The set of factory default messages from the MIDI strips is translated to a corresponding HUI or Mackie Control message.
- Multiple virtual ports named DAW Control MIDI n are created (use one for each block of 8 strips).
As a result, it is much easier to set up control of levels, mutes, solos of multiple DAW tracks. A set of instructions for several major DAWs is available here.
Note that DAW Control can be used as an alternative to or ON TOP OF the TCP MIDI Driver. For example you might still want custom MIDI messages (from the SoftKeys or MIDI Strips) to trigger particular events or control certain parameters in the DAW software, perhaps your Cubase master bus or FX sends.
Submix on a GLD or iLive
Enough for DAWs now, but not quite finished with MIDI yet. Say you have a 30 piece orchestra making an appearance at the next gig. A shame you are already using 40+ channels on your GLD for the main band, speakers and guests. You hire in an iLive iDR-32 but there is no room (or budget) for a second surface at FoH. You have the MixPad app running on your iPad but you wish you could tweak the orchestra mix from the GLD too.
This can be done by MIDI linking the two devices via standard MIDI DIN cables. GLD and iLive use a very similar MIDI Protocol. If on the same MIDI channel, changes to GLD ch 1 level, mute etc. will be mirrored on iLive ch 1. Recalling Scene 1 on GLD will recall Scene 1 on the iLive, and so on. This is of limited use for the purpose of our example, so bear with me a moment.
Let’s set the MIDI channel on the GLD to 2 in the Setup / Control / MIDI screen. Now the two systems are not mirrored, and we can decide what exactly we want to control in the iLive by customizing our 32 MIDI Strips. We should start by studying the iLive MIDI Protocol, to find out for example that:
- BN, 63, CH, BN, 62, 17, BN, 06, LV controls fader levels, where N is the MIDI channel, CH is the iLive channel (see table in the spec document), and LV is the value.
- 9N, CH, xx, 9N, CH, 00 (Note On followed by Note Off) controls mutes, where xx >40 is Mute On, <40 is Mute Off.
- BN, 63, CH, BN, 62, 19, BN, 06, GV controls preamp gains, where GV is the value.
Our GLD MIDI Strips need to fire out (and respond to) messages on MIDI ch 1. If we were to set MIDI Strip 1 to control ch 1 on iLive, this will look like:
- B0, 63, 20, B0, 62, 17, B0, 06, <VAR> where <VAR> is the variable value from the MIDI Strip.
- 90, 20, <VAR>, 90, 20, 00
- B0, 63, 20, B0, 62, 19, B0, 06, <VAR>
For a starting point you might want to have a look at the Show file I’ve just uploaded in the GLD Libraries.


